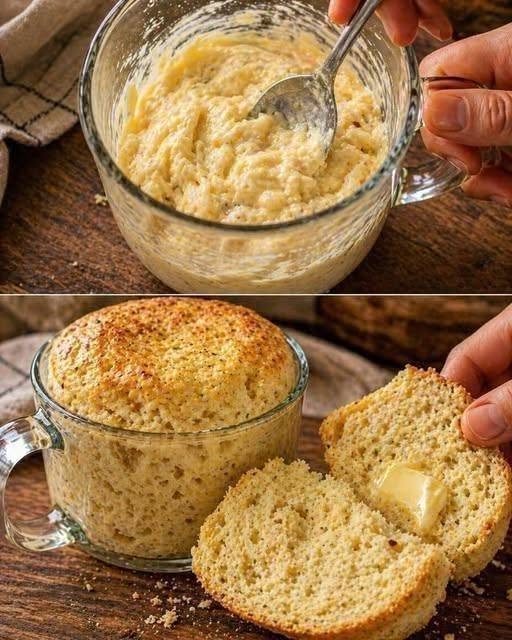
The ultimate 90-second single-serving mug bread requires no yeast, no kneading, and no waiting for dough to rise. Whether you are following a low-carb lifestyle, managing a busy schedule, or simply craving warm toast on a whim, this culinary hack delivers fresh, customizable bread in the time it takes to brew a cup of coffee.
The Anatomy of Mug Bread
Traditional bread making is an art form rooted in patience, requiring precise hydration, gluten development through rigorous kneading, and time-consuming fermentation. Mug bread bypasses these traditional barriers by utilizing alternative flour matrices and chemical leavening agents that react instantly under microwave radiation.
The primary structural integrity of mug bread comes from a binding agent—most commonly a whole egg or an egg white—combined with a fine flour substitute like blanched almond flour or coconut flour. Because alternative flours lack gluten, they cannot trap gases the way wheat flour does. Instead, baking powder provides the necessary lift, creating pockets of carbon dioxide that expand rapidly when heated, yielding a surprisingly soft, spongy, and sturdy crumb.
Master Recipe: 90-Second Almond Flour Mug Bread
This foundational recipe produces a savory, neutral-flavored loaf that can be sliced, buttered, or used as a base for sandwiches, avocado toast, and quick-fix snacks.
Ingredients
-
1 tablespoon butter (melted) (or substitute avocado oil / coconut oil)
-
4 tablespoons blanched almond flour (fine grind yields the best texture)
-
1/2 teaspoon baking powder
-
1 large egg (use room temperature for an even rise)
-
1 tiny pinch of fine sea salt
-
Optional enhancements: 1/2 teaspoon garlic powder, Italian seasoning, or a pinch of everything-bagel spice.
Step-by-Step Instructions
-
Prep the Vessel: Select a standard, microwave-safe ceramic mug or a 4-inch flat-bottomed ramekin. Pour the melted butter or oil directly into the container, swirling it around to coat the bottom and inner sides thoroughly. This prevents the batter from sticking and ensures the finished bread slides out effortlessly.
-
Combine Dry Components: Add the almond flour, baking powder, and salt directly into the greased mug. Take a fork and whisk these dry components together briefly to distribute the leavening agent evenly, eliminating any potential clumps.
-
Integrate Wet Components: Crack the egg directly into the mug on top of the dry mixture. Add your chosen optional seasonings if you want a savory flavor profile.
-
Mix to a Smooth Batter: Vigorous mixing is essential here. Using your fork, beat the egg into the dry ingredients, scraping down the sides and bottom corners of the mug. Continue stirring until a uniform, smooth batter forms. It should look slightly fluid but thick.
-
Settle and Bubble-Check: Tap the base of the mug sharply against your kitchen counter two or three times. This forces trapped air bubbles to rise to the surface, ensuring your bread has a consistent, dense crumb structure free of large internal cavities.
-
Microwave on High: Place the mug into the microwave and cook on high power for 60 to 90 seconds. Microwave wattages vary significantly; look for the top of the bread to look completely set, dry to the touch, and spring back lightly when pressed with a finger. Avoid overcooking, as excess time will turn the crumb rubbery or dry.
-
Rest and Unmold: Remove the mug carefully using a potholder. Let the bread rest undisturbed inside the mug for 60 seconds. This brief resting period allows internal steam to redistribute, firming up the structure. Run a butter knife gently around the perimeter, then invert the mug onto a clean plate or cutting board. Give it a gentle tap, and the loaf should slide right out.
Flour Variations and Adjustments
Different flours absorb moisture at drastically different rates. If you prefer to switch up the base of your mug bread, adjust your measurements accordingly:
-
The Coconut Flour Alternative: Coconut flour is immensely absorbent compared to almond flour. If substituting, use 1 and 1/3 tablespoons of coconut flour in place of the 4 tablespoons of almond flour. Because coconut flour absorbs more liquid, you may also need to splash in an extra teaspoon of milk, water, or melted butter to keep the batter from becoming overly dry.
-
The “Less Eggy” Modification: Some individuals find that microwave mug breads carry a distinctively rich egg flavor. To neutralize this, substitute the whole egg with two egg whites or add a tiny splash (about 1/2 teaspoon) of apple cider vinegar. The acid reacts with the baking powder to boost the rise while masking the eggy profile completely.
Pro-Tips for Culinary Success
-
Always Toast for Texture: While you can eat mug bread straight out of the microwave, the secret to elevating it from a “quick fix” to a gourmet experience is to slice the loaf horizontally into two rounds and pop them into a toaster or skillet with a bit of butter. Toasting creates golden, crispy edges while maintaining a soft, warm interior.
-
Batch Dry Mixes: If you plan on making mug bread frequently, whisk a large batch of the dry ingredients ahead of time (e.g., proportional mixes of almond flour, baking powder, and salt) stored in a sealed mason jar. When a craving strikes, simply scoop out the required dry measure, add your wet ingredients, and cook.
-
Flavor Customization: Do not feel constrained to plain bread. Turn it into a breakfast treat by folding in a pinch of cinnamon and a drop of vanilla extract, or lean into a savory dinner side by mixing in a tablespoon of grated parmesan cheese and dried rosemary.
What kind of toppings or flavor profile are you planning to pair with your first mug bread?
