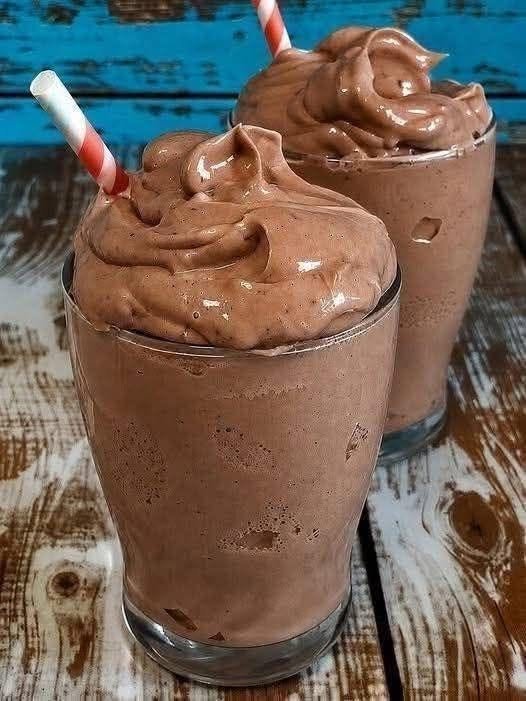
There is a common misconception that functional nutrition—fueling your body with adequate protein, wholesome micronutrients, and clean energy—has to taste like a chore. For years, fitness enthusiasts and health-conscious individuals suffered through chalky, clumpy protein powders blended with plain water, dreading their post-workout routine.
Fortunately, the culinary evolution of health foods has turned the humble protein shake into a luxurious, gourmet experience. This Ultimate Velvet Chocolate Protein Shake changes everything. It combines rich, dark cocoa notes with a luxuriously thick, frost-like texture that mimics a high-end diner milkshake, all while delivering a powerful macro-nutrient profile designed to repair muscles, sustain energy, and satisfy sweet cravings without the sugar crash.
This comprehensive, step-by-step masterclass will guide you through the ingredients, the science of blending, and the exact techniques required to create a world-class chocolate protein shake right in your own kitchen.
The Anatomy of an Exceptional Protein Shake: Beyond Powder and Water
A truly great protein shake is not just about dumping a scoop of powder into a shaker bottle. To achieve a smooth, velvety mouthfeel and balanced nutritional value, you need to understand how the components interact:
-
The Protein Foundation: Whether you prefer whey isolate, plant-based pea and hemp blends, or collagen peptides, the protein choice determines your macro breakdown. High-quality protein provides the essential amino acids needed for muscle synthesis and metabolic health.
-
The Thickening Agents: Watery protein shakes are unappealing. By incorporating frozen elements like cauliflower rice (completely tasteless when blended, providing fiber and bulk) or frozen zucchini, along with natural binders like chia seeds or half a frozen banana (or avocado for lower-carb variations), you create a rich, frosty consistency without adding heavy fats or sugars.
-
Deep Flavor Enhancers: Real cocoa powder or raw cacao adds authentic, antioxidant-rich chocolate flavor that masks any artificial aftertaste from protein powders. A pinch of sea salt elevates the chocolate notes, making them pop on your palate.
Equipment Needed
-
High-powered blender (crucial for pulverizing ice and frozen produce into a smooth emulsion)
-
Measuring cups and spoons
-
Spatula or spoon for scraping down the sides
-
Tall serving glass
Ingredient Breakdown
1. The Core Protein & Liquid Base
-
1 scoop (approx. 30g–35g) High-Quality Chocolate Protein Powder: Choose whey, casein, or your favorite plant-based option depending on your dietary preferences.
-
1 cup Unsweetened almond milk, cashew milk, or coconut milk: Keeps calories and carbohydrates low while providing a smooth liquid carrier.
-
½ cup Cold filtered water or brewed chilled espresso: Adding a shot of espresso turns this into a decadent mocha-flavored powerhouse.
2. The Texture and Nutrient Boosters
-
1 medium Frozen banana (sliced): Imparts natural sweetness, potassium, and a thick, creamy, ice-cream-like consistency. (For a lower-carb keto option, substitute with ½ of a small avocado or 1 cup of frozen cauliflower florets).
-
1 tablespoon Unsweetened cocoa powder or raw cacao powder: Intensifies the deep, rich chocolate profile.
-
1 tablespoon Chia seeds or ground flaxseeds: Provides healthy omega-3 fatty acids, dietary fiber, and acts as a natural thickener.
-
1 tablespoon Natural peanut butter or almond butter: Injects healthy fats, keeps you satiated for hours, and introduces a classic chocolate-peanut butter flavor synergy.
3. The Secret Flavor Enhancers
-
½ teaspoon Pure vanilla extract: Rounds out the complex chocolate notes.
-
A tiny pinch of Fine sea salt or pink Himalayan salt: Essential for cutting bitterness and enhancing overall sweetness.
-
3 to 5 Ice cubes: Adds a frosty chill and expands the volume into a voluminous, airy shake.
-
Optional Sweetener: 1 packet of stevia, monk fruit, or 1 teaspoon of pure maple syrup if your protein powder isn’t sweet enough.
Step-by-Step Preparation Guide
Phase 1: Strategic Loading of the Blender
The secret to avoiding annoying clumps of protein powder stuck to the bottom of the blender canister is the order in which you add your ingredients.
-
Add Liquids First: Pour the 1 cup of unsweetened almond milk and the ½ cup of cold water or espresso directly into the bottom of the blender jar. Liquids at the base allow the blender blades to spin freely immediately upon startup, creating a vortex that pulls upper ingredients down smoothly.
-
Add Powders and Spices: Drop in your scoop of chocolate protein powder, the tablespoon of cocoa powder, chia seeds, vanilla extract, and the pinch of sea salt. Allowing the powders to hit the liquid first helps hydrate them instantly rather than flying up the sides of the dry canister.
-
Add Nut Butter: Spoon in your almond or peanut butter. Placing it near the liquid helps it disperse evenly rather than sticking in a dense glob to the blades.
-
Add Frozen Elements and Ice: Finally, layer your frozen banana slices (or alternative thickener like avocado/cauliflower) and the ice cubes on top. The weight of the frozen components helps press everything down into the blades as blending begins.
Phase 2: Blending Technique for Maximum Velvet Texture
-
Initial Pulse: Secure the blender lid tightly. Pulse the blender 3 to 4 times for 2 seconds each to break down the ice cubes and roughly combine the layers.
-
Low-to-High Speed Transition: Start the blender on low speed for about 5 seconds, then rapidly ramp it up to its highest speed setting.
-
The Vortex Method: Let the blender run on high speed for 45 to 60 seconds. Watch the top of the liquid; you should see a deep, smooth vortex forming in the center. This high-speed shearing action forces air into the mixture, expanding its volume and creating that coveted, milkshake-like froth.
-
Scrape and Finish: If any protein powder clings to the upper walls of the jar, stop the motor, use a spatula to scrape it down into the mix, and blend on high for an additional 15 seconds until completely uniform and glossy.
Phase 3: Pouring and Presentation
-
Chill the Glass: For an authentic café experience, place your serving glass in the freezer for 5 minutes while you blend the shake.
-
Pour: Remove the glass and pour the thick, rich chocolate protein shake directly into the center. Watch as it cascades down, holding its thick, creamy structure without separating into watery layers.
-
Optional Garnishes: Dust the top with a tiny pinch of cocoa powder, a few cacao nibs for crunch, or a drizzle of sugar-free chocolate syrup along the inside of the glass before pouring.
Pro-Tips for Customization and Meal Prep
-
The Overnight Oats Variation: If you need a more substantial meal replacement, throw ¼ cup of old-fashioned rolled oats into the blender with the liquids and let them soak for 2 minutes before blending. This adds slow-burning complex carbohydrates ideal for endurance athletes.
-
Green Superfood Hack: You can easily sneak a packed cup of fresh baby spinach into this shake. Because the cocoa powder and chocolate protein powder have such a dominant flavor profile, the spinach will completely disappear visually and texturally, giving you an extra dose of iron and vitamins without altering the taste.
-
Make-Ahead Smoothie Packs: Prep your ingredients in advance by placing the frozen banana slices, chia seeds, cocoa powder, and nut butter into individual freezer-safe bags or containers and storing them in the freezer. When morning arrives, simply dump the contents of one bag into your blender, add your liquid and protein powder, and blend instantly.
Nutritional Information (Estimated Per Serving)
-
Yield: 1 large serving (approx. 16–20 oz)
-
Calories: ~380 kcal (varies depending on nut butter and milk choice)
-
Protein: ~28g to 35g
-
Net Carbs: ~18g
-
Fat: ~14g
